Thanks for buying an original flippeeTM frame! This patent pending frame assembly provides UV protection for your valuables and provides a pleasing flip to ‘see the other side’ of your valuables. Please read the safety warnings and cautions below and then watch the video above or see the instructions below to enjoy your flippee for years to come.
Safety Warnings
Keep out of the reach of children
Do NOT use flippee for rare or valuable items that could be damaged if dropped
Do NOT disassemble flippee (small springs inside)
Do not mount in narrow hallways or tight spaces
Do not use undue force to flip flippee
Keep mounted flippee out of direct sunlight
Mount only as described below
Indoor use only
Before you flip …
Make sure the contents of your flippee magnetic holder are secure. The flippee’s 35 pt magnetic holder works for virtually all standard cards, but may be too loose or too tight for your cards or photos. The 35 pt holder can typically hold 2 cards or photos back-to-back, but ALWAYS check to make sure magnetic holder contents are not loose in the holder. If the cards ‘rattle’ when inserted, consider using an internal sleeve or backing the contents with another card. Your cards/photos will thank you …
Pull the flippee out. Maybe give the frame a flip or two just to, ‘make sure it’s working” …
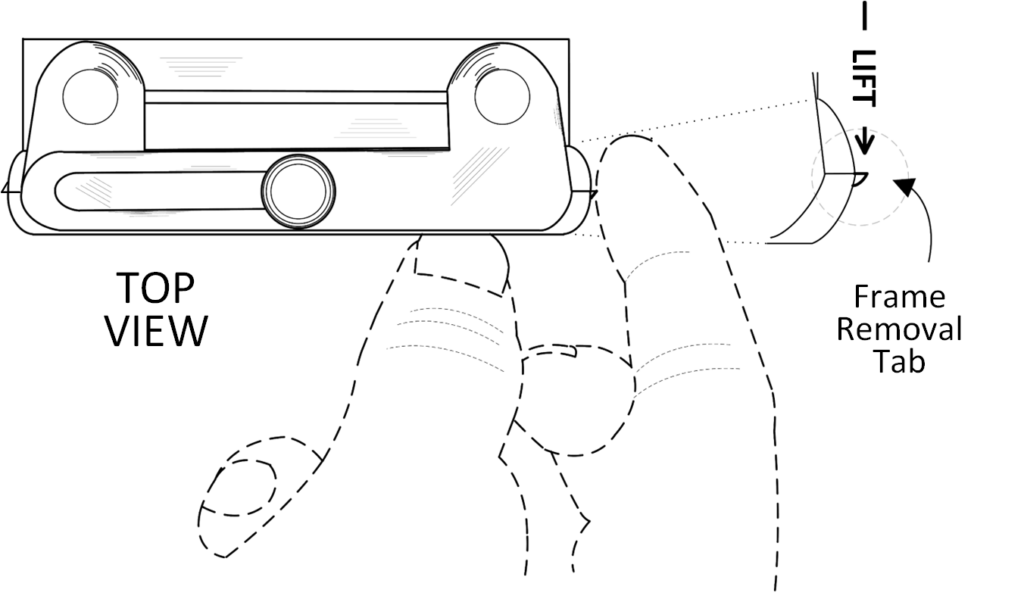
With your thumb on the clear acrylic holder, lift up on the frame removal tabs to open the frame. Remove the frame half and retain it.
Remove the clear acrylic magnetic holder from the frame by pulling it away from the remaining frame half.
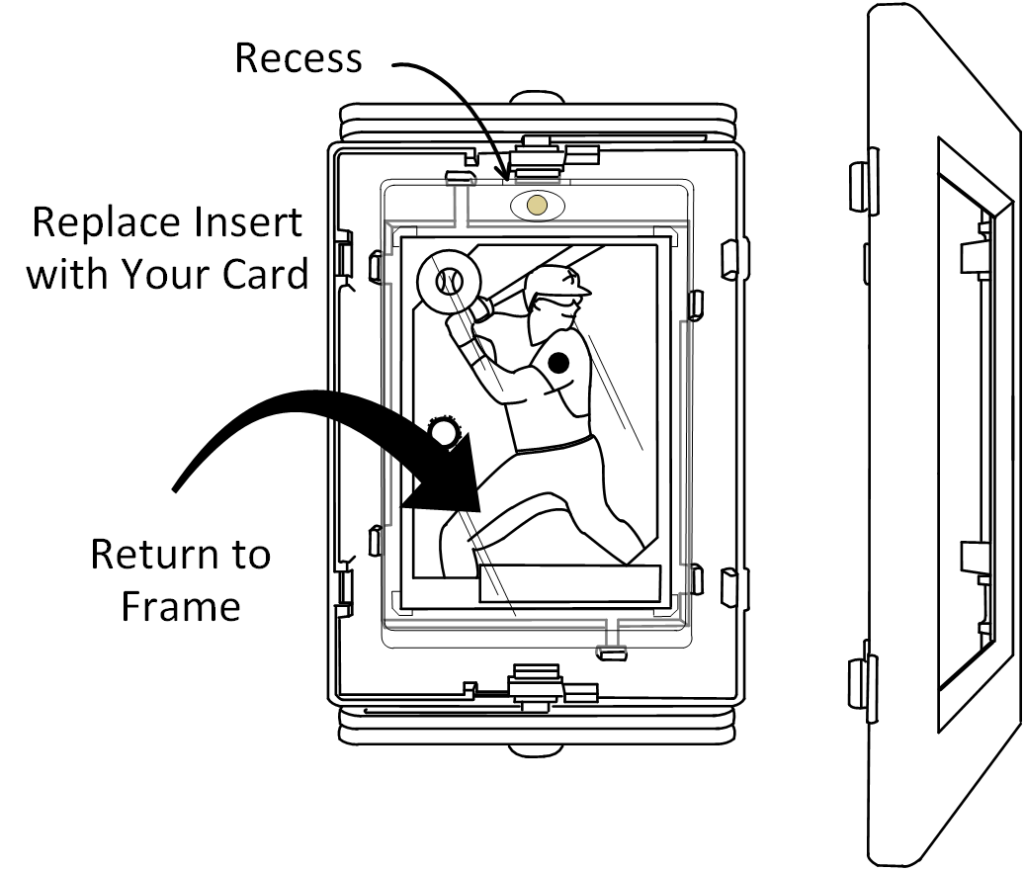
Step 2 - Place your card in the magnetic holder and replace the holder in the frame
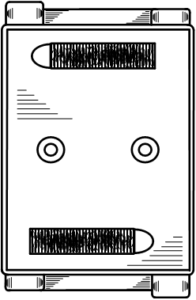
Open the magnetic holder using the recess near the magnet. Remove the flippee insert, and replace with your card or photos in the same orientation as the insert. Re-connect the magnetic holder together and insert it back into the frame with the magnet side up (picture will be centered in the frame)
Alternative Instructions– If you have a card or photo set that is already in a magnetic holder, you might insert that magnetic holder into the frame instead* (flippee is compatible with most magnetic card holders).
* Note: Depending upon the desired card orientation, the card may need to be flipped in the holder or the frame may need to be flipped. See Inverse install
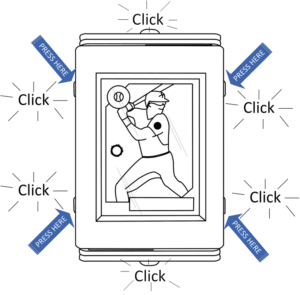
Step 3 - Reinstall the front frame
Place the removed frame half on top of the frame, with the same orientation as originally removed. Align the frames together, and then gently press the frame halves together until the frames lock together (you’ll hear a click when they align). Press firmly around the frame to engage all the frame locks (there are 6 total – including one on top and bottom).
Flippee is now ready to be mounted.
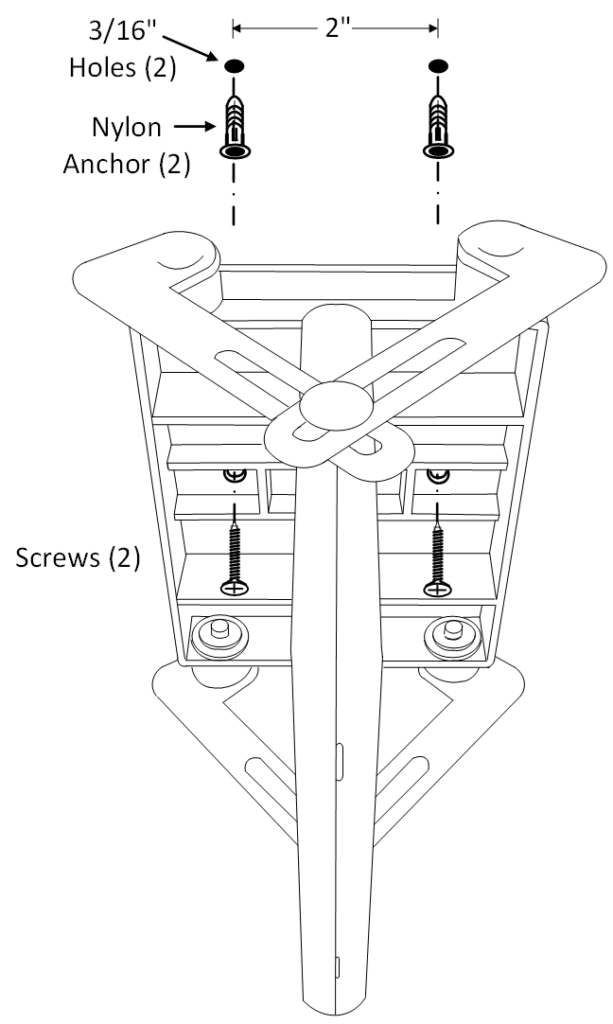
Step 4 - Mount the flippee
Screw Mount (preferred for drywall)
Open the flippee and place on the wall where it will be mounted. Using a level, mark the location where holes are needed with a pencil. Remove the frame and drill the holes with a 3/16″ (5 mm) bit where marked. Insert the nylon anchors into the holes and then place screws through the flippee mount into the anchors. Tighten fully. Flippee is now ready to be flipped!
Command® brand Wall Mount (no wall damage)
Use Command® brand damage-free hanging mounters (10 lb. size recommended, not included) instead of screws. To use these mounters, follow the directions on the packaging and install mounter pairs on the frame mount back top and bottom (horizontally, see photo). Ensure that flippee is level then press to apply. Flippee is now ready to be flipped!
How to Flip – 4 easy steps
Front View
Side View
Step 1 -
Finger placement -Lift
Finger almost touching the wall
Front View
Side View
Step 2 -
Lift Frame - Wrap Finger
Finger wraps around back of the frame
Front View
Side View
Step 3 - Pull Back, Flip Frame
Finger pulls frame back, then ‘flips’ the frame around the pivot point
Front View
Side View
Step 4 - Watch it Work!
Frame retracts into perfect position
What to put
in your flippee
Sports cards are great, but consider these uses for your flippee:
Youth sports cards * Game cards (Pokémon®/Yu-Gi-Oh!®/MTG) – back-to-back evolution or two faves! *
School Pictures (flippee supports wallet size photos) * pics with titles like #1 daughter or # 1 Dad *
Anniversary cards (wedding picture/anniversary picture) * Before/After photos * Antique tobacco cards *
Non-Sports Cards: Star Wars®/Garbage Pail kids®/Star Trek®/Marvel®/Disney®/Presidents/Pinup Art/Boxing *
Breakfast/Dinner menus * Flash Cards * Trading Card Games * Stamps
Tickets and other sports memorabilia * Stamps * Business Cards * Special events
Inverse Install
Some flippeeTM users have reported that cards can slip within the magnetic holders if the magnet is on the top. If this happens, the inverse install can correct the problem. Essentiallly, the frame and card are rotated 180 degrees so that the magnet is on the bottom (see figure).
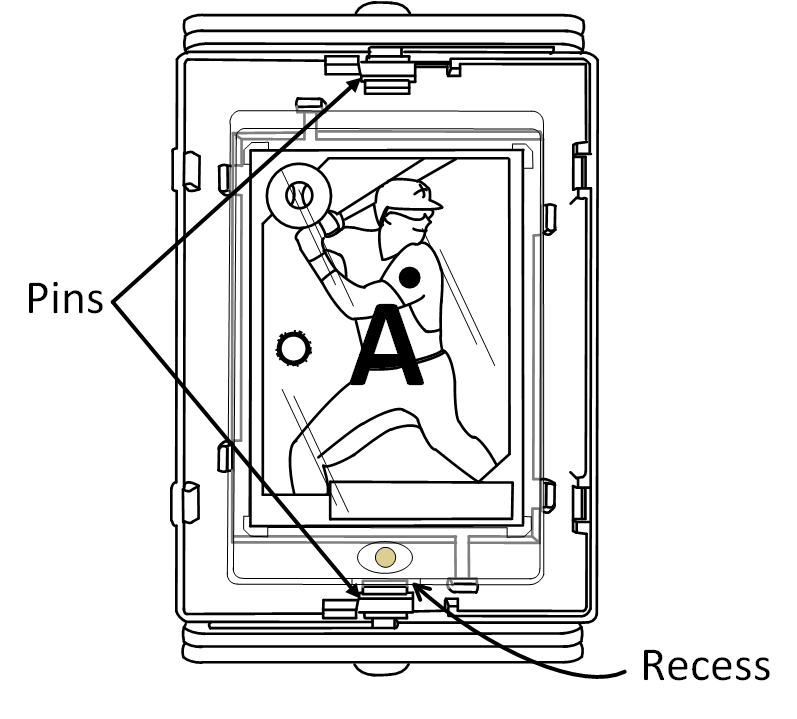
To install a card with the inverse install, open the frame as shown in Step 1 above. With the top half of the frame removed, lift both sets of pivot arms and their respective pins and rotate the frame half 180 degrees. Rotate the card as well (if needed) so that it is upright when mounted and seat pivot pins back into the top and bottom of the frame half. Replace the other frame half (after rotating 180 degrees) as shown in Step 4. Flippee is now ready to be mounted.
Note that the 4-step instructions above still work, but must be implemented as a mirror image of the figures (due to the rotation).